
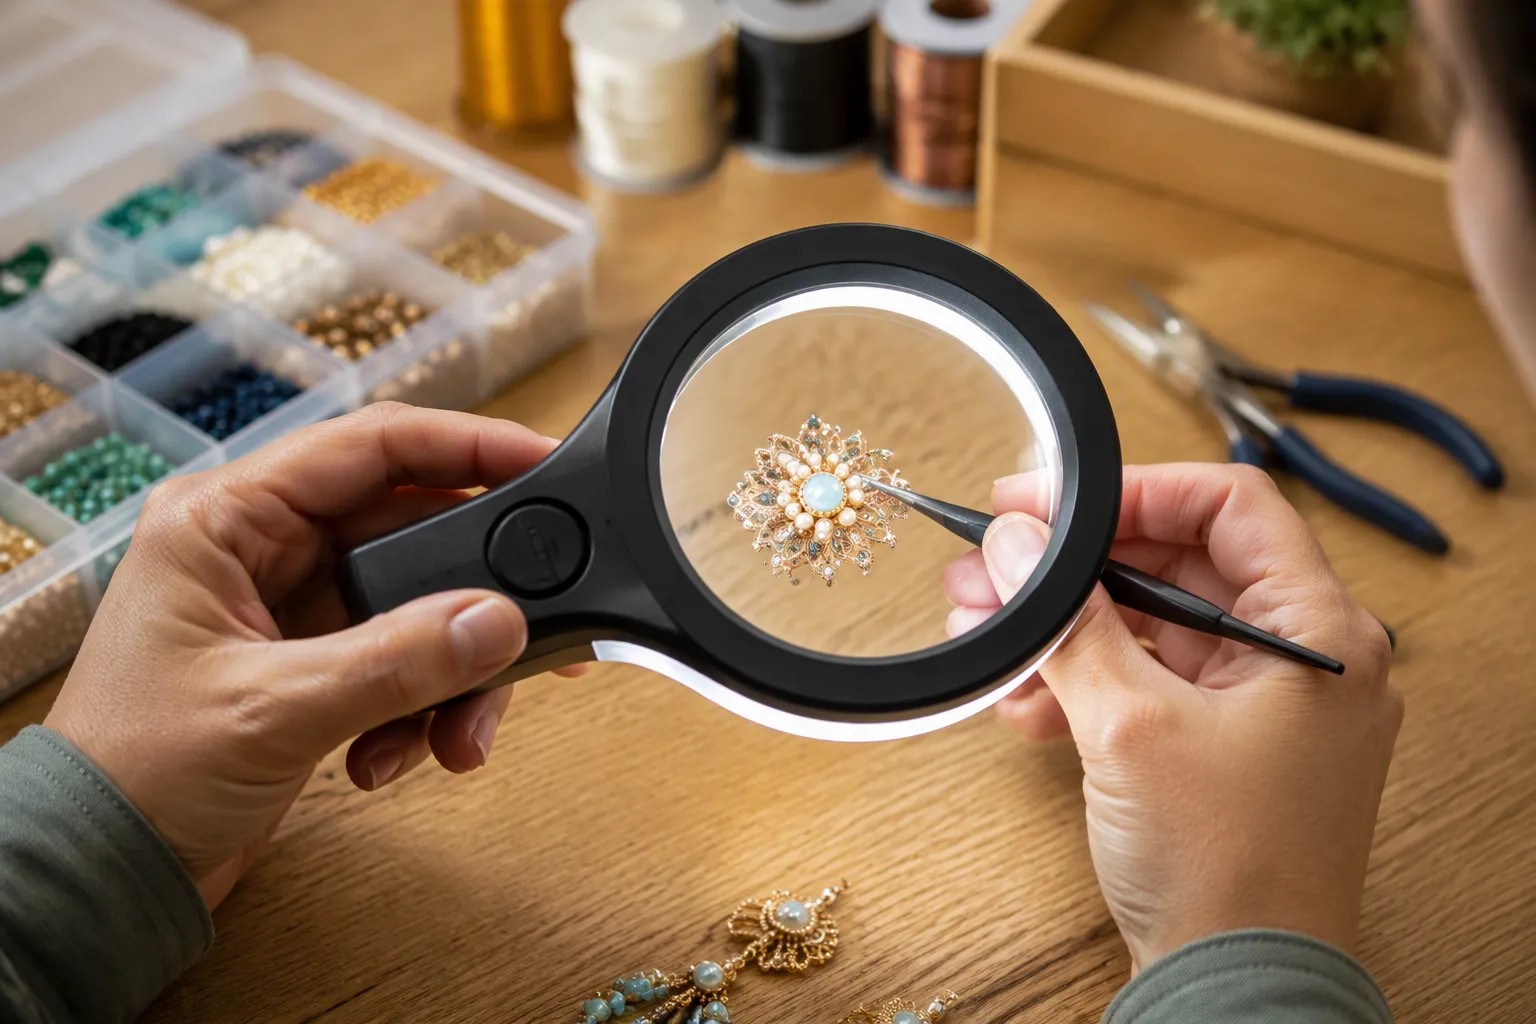
Lighted magnifying glass 5 tricks every crafter should know
You squint to put thread through a needle, but your fingers stop. Small details turn into a blurry mess. A lighted magnifying glass can fix this, but only if you use it the right way. Good tools work best with good habits. Learn five tricks: pick the right settings, place the magnifier so you are comfortable, stop glare, take care of the tool, and make it part of your crafting routine. With a magnifying glass with light, you can finally see small details clearly. This lighted magnifier turns hard work into real fun. Watch these details, and you will keep your eyes from getting tired. Try one trick today and see how much better you work.
Key Takeaways
- Choose the right magnification and brightness for your craft to see details clearly and reduce eye strain.
- Position your magnifier so the workpiece sits centered under the lens and your eye looks straight down.
- Angle light from the side and use a diffuser to cut glare and shadows for a clear view.
- Clean the lens with a microfiber cloth and cool water before each session to keep your view sharp.
- Store your magnifier in a hard case away from heat and moisture to protect it from damage.
- Keep your magnifier within reach on your workbench so you use it often for quick checks.
- Use the 20-20-20 rule during long sessions to rest your eyes and prevent fatigue.
- Pair your magnifier with tweezers or pliers to keep both hands free for precise work.
Trick 1: Choose the right magnifying glass with light settings
Match magnification to your hobby
Your hobby decides the magnification you need. A lighted magnifying glass with too much power makes your view tiny and cramped. Too little power leaves fine details blurry. Match the lens to your task, and you will work faster with less strain.
Sewing and embroidery have clear ranges. General machine monitoring works well at 1.75x . Detail work calls for 2x, and finer detail work needs 2.25x. Large floor-standing viewing suits 3x. Digitizing and diagnosis use 5x to 8x, while spot inspection with inset lenses uses 4x or 8x. For most needlepoint, 1.75x to 2.25x hits a sweet spot—making stitches bigger without making you bend over your canvas. Electronics work has its own rules. A 2x magnifier with a 3.5x spot lens works for soldering and small electronics, and a 2.5x headband magnifier fits electronic inspection. Jewelry making, cross-stitch, model building, and miniature painting work well at 2X to 4X .
Adjust brightness and light color
Light quality matters as much as lens power. Added light and the contrast it creates can often boost visibility and reduce eye strain . Sometimes this means you need less magnification than you would otherwise. That means a brighter, better light can save your eyes.
Color temperature shapes what you see. All Daylight brand lamps and magnifiers are set at a true daylight temperature of 5,500K–6,000K . Embroidery work does well with daylight bulbs around 6400K , which show colors accurately, though such lamps can cost a lot. A cooler white light near 4000K gives you a cheaper but still good option. A 6000K cool white LED light at 800 lumens in a magnifying lamp helps you see every detail and make high-quality stitches. Look for a model with multiple magnification levels and adjustable brightness. Multiple magnification options like 2x, 5x, and 10x let you choose the right level for each task. Adjustable brightness settings let you control light strength for different rooms and jobs. Together, magnification and illumination cut down fatigue and protect your vision during long sessions.
Test settings on scrap material
Never start a fine craft project on untested settings. Grab a scrap of the same fabric, wire, or canvas you plan to use. Set your lens and light, then look at the scrap through the lens.
Check three things. First, make sure you can see the smallest detail you need, such as a single thread or a solder joint. Second, check for glare or hot spots on the surface. Third, adjust the brightness until your eyes feel relaxed. A lighted handheld magnifier makes this trial easy because you can move it freely. Run this quick test every time you switch tasks. A few seconds of testing saves you from redoing work later.
Trick 2: Position your lighted magnifier for comfort
Center the workpiece under the lens
Your lens works best at its center. Move your craft so the smallest details sit right under the middle of the lens. The edges of a lens show distortion. Straight lines curve. Focus gets soft. One crafter who tested a lens closely put it this way:
The lens does display significant fisheye and focus distortion at close ranges, and I’m not sure how linear the scaling would be over the full image. I chose to only use the center of the image as a valid reference point; the work is always moved to the center and nothing off that center is considered positionally valid.
That habit pays off. You stop trusting the blurry edges. You stop misjudging where your needle or brush should go. Slide your hoop, model, or circuit board until the target area sits dead center. Then check your view again.
Find the right eye distance
A stand magnifier sits at a preset height. That height matches the focal length of the lens. Keep the base flat on your table. Do not tilt it. Do not lift it toward your face. The lens already sits at the correct working distance for sharp focus.
Place your eye directly above the lens. Look straight down through the glass. If you lean in from the side, you lose the sweet spot and gain distortion. Handheld models give you more freedom. You can raise or lower the lens until the image snaps into focus. Test this on scrap first. Your arm will tell you when the distance feels right.
Use a stable stand or clamp
A steady base changes everything. Once you clamp or set your lighted magnifier in place, both hands stay free to work. Here is what a good stand or clamp gives you:
| Benefit | Supporting Detail |
|---|---|
| Hands free operation | Once the clamp-on or gooseneck magnifier is positioned, both hands remain free to work on the project. |
| Stability during work | Weighty, wide stand or clamp bases prevent the lens from wobbling when hands or tools rest on the surface. |
| Reduced neck strain | Keeps you from constantly leaning into a handheld magnifier, easing neck fatigue. |
| Adjustable positioning | Joints, hinges, or gooseneck arms hold their position and let you re-angle the lens as you switch tasks. |
| Dedicated work station | On a larger craft table, the anchored magnifier creates a stable station where hoops, models, or paper can slide under the lens. |
| Ideal for longer sessions | Lamp-style magnifiers with clamp/base work best on a sturdy desk, suiting embroidery, quilting, or model building. |
A weighted stand keeps the magnifying head steady while a flexible gooseneck arm moves the lens where needed. A large clamp attaches to many table styles, and a swing arm repositions the lamp over your work area. Diffuse lighting plus magnification helps reduce eye strain, so you do not squint at small details. Some models even let you detach the lens from the stand for handheld use. For long sessions, a hands-free magnifier with a headband or glasses-style frame also works well. These frames keep both hands free and remove the need to hold anything. Pick the setup that matches your craft and your space.
 Hands stitching floral embroidery in a hoop positioned directly beneath an adjustable lighted magnifying desk clamp lamp

Trick 3: Use the light to cut glare and shadows
Glare and shadows make clear views turn into guesswork. A bright, adjustable light source stops both of them. The right angle, a simple diffuser, and small position changes make the work easier to read.
Angle the light from the side
Direct overhead light makes harsh reflections on glossy items. Varnished models and laminated instructions bounce light back into your eyes. Angle light from the side to show texture and depth. Side lighting shows thread counts, solder joints, and brush strokes.
| Lighting angle | Why it reduces glare and shadows |
|---|---|
| Raise the lens rather than the lamp | Stops glare on varnished models and printed pages |
| Use a ring-style LED around the lens | Stops shadows from hands or tools |
| Keep the light close to the lens | Stops uneven lighting; light matches your view |
| Use adjustable LED brightness | Cuts glare on reflective, glossy, or matte materials |
Some magnifying glass with light models include a ring LED around the lens. That fixes shadow problems before they start. Choose adjustable brightness to match each material.
Diffuse harsh light simply
Harsh light makes shiny surfaces unbearable. Diffusion spreads the beam and softens it. You probably have materials around home that work.
White tissue paper, parchment paper, a thin shower curtain, a white cotton sheet, or even a clean white garbage bag all work. Tissue is the weakest and parchment is the usual first choice; cotton fabric gives the softest result but scorches near a hot bulb. Whatever you use, pull it taut and tape it to the inside of the frame, because wrinkles print on the subject.
| Material | Opacity | Light loss | Best use |
|---|---|---|---|
| White garbage bag | Low | Minimal | Quick first build; wrinkles badly |
| Parchment or baking paper | Medium | Moderate | Cheap, heat-tolerant, easy to replace |
| Single layer white tissue | Low | Very low | Softens edges; use two layers |
| White cotton sheet | Medium-high | Moderate to high | Softest result, but needs a frame |
| Frosted acrylic | High | High | Durable, needs a brighter source |
Tape the material flat. Test on a scrap piece first.
Adjust to remove shadows
Shadows trick your eyes. A shadow hides the spot where your needle should land. Move the magnifier, not your head. Moving the light changes where the shadow falls. Your head movement keeps the shadow in place.
Rotate the lens until the shadow goes away. A ring-style LED stops hand and tool shadows. Your hands stay under the light. Shift the magnifier to change shadow patterns. The goal is even lighting, so every detail stays visible.
A lighted magnifying glass gives you control over light and magnification. Your lighted magnifier becomes a precision tool with practice. Good angles, diffusion, and positioning get rid of eye strain.
 Inspecting PCB electronics under a lighted magnifying glass with anti-glare light diffusion technique

Trick 4: Keep your magnifying glasses with light clean
Everything works better when your lighted magnifying glass is cared for. Dust dulls the glass. Grease weakens the beam. Scratches block the light. A few minutes of cleaning keeps your view sharp and your eyes relaxed.
Clean the lens safely
Use a microfiber cloth. Paper towels can leave fine scratches. Harsh chemicals strip the coating off the glass. Cool water is all you need. Wipe in gentle circles. Make this a habit before every long session. Skin oils and dust build up fast.
The lens is the heart of your lighted magnifier. A clean magnifying glass with light shows true details. A dirty lens scatters light. You turn the brightness up to compensate. That extra glare tires your eyes. Clean the lens before storing. Grit and dust on the glass can scratch it while the tool sits idle.
Care for the light and batteries
Replace batteries before they dim. Weak batteries reduce light output. You lean closer and closer to the work. Your neck and eyes pay for that. Remove batteries when you store the tool for a long time. Leaking batteries ruin the compartment.
Check the LED ring and bulb area regularly. Dust gathers in small crevices. Use a soft brush or a small air blower. Keep the metal contacts dry and clean. Fresh batteries give steady magnification and even illumination. You see fine stitch work without squinting or guessing.
Protect the magnifier from damage
Always store the device in a rigid, hard-shell case with a soft, lint-free lining. That case absorbs pressure, bending, and impact. Never leave it in a hot car. High heat can warp, bubble, or delaminate lenses and frames.
| Hazard | Smart storage practice |
|---|---|
| Moisture | Keep the case in a dry, stable spot. Add a silica gel packet to absorb humidity. Air-dry the device fully before sealing it. |
| Heat | Avoid direct sunlight through windows. Do not leave it in a hot car. Avoid rapid temperature swings. |
| Physical impact | Use padded or hard cases for transport. Store the device supported and stable. Keep small optics in separate compartments so they cannot knock together. |
For long-term storage, choose a climate-controlled area. Garages and sheds change temperature too much. Loosen over-tight straps that press on knobs or brackets. A hard case keeps loose parts from jostling your magnifying glasses with light. Lighted magnifiers last longest when they have a dedicated spot on your shelf.
Clean the lens with cool water and a microfiber cloth before you pack it away. That simple act protects the glass and prepares the tool for your next project. Care takes minutes. The payoff is a clear view every single time. Protected equipment keeps a crisp view and steady light. Treat your tool well, and it will serve you for years.
Trick 5: Make the lighted magnifying glass part of your hobbies
Keep it within reach
A tool you have to search for is a tool you skip. Keep your lighted magnifier on the workbench or beside your sewing machine or jewelry station. When the tool sits within arm's reach, you use it without thinking. This habit improves crafts like embroidery and model building. A well-arranged workbench gives stability and organization; precision work needs accuracy. Accuracy needs reachable tools, and built-in lighting shows fine details. Keep accessories like Extra Hands with Magnifier or a headband Magnivisor near your main magnifier.
Some crafters prefer to wear the magnifier. Headband magnifiers have rubber nose pads and adjustable straps, so they spread weight evenly and prevent pressure points. Built-in LEDs and replaceable lenses allow hands-free work for hours. Clip-on magnifiers attach to your glasses and give a lightweight, distortion-free option for quick adjustments. Flexible neckwear styles let you direct light where you need it.
Use it for quick checks
Don't limit your magnifier to long sessions. Use it for ten-second checks. Check a seam after every few stitches, and check a solder joint as soon as you put down the iron. These micro-checks catch problems before they grow. Most magnifying lamps with adjustable heads can switch from a broad workspace view to close-up inspection in seconds. The swing arm moves over the exact stitch or solder spot, then moves aside with one hand. Flicker-free, glare-free LEDs give bright, even, shadow-free light. A headband model lets you inspect seams between sessions without using your hands.
During long sessions, use the 20-20-20 rule: every 20 minutes, look 20 feet away for 20 seconds. Stick to 2x–3x magnification for extended wear, because this range lowers the risk of nausea and eye strain. Distortion-free prismatic lenses also keep your eyes relaxed.
Pair it with other tools
Your magnifier works better with tweezers, pliers, or a task light. Hold a part with tweezers while you inspect it under the lens. Use pliers to bend wire while the magnifier shows every angle. A clamp-on model keeps your hands free for steady work.
A magnifying lamp with a flexible arm is a strong partner. The gooseneck arm places the lens exactly where needed and sends both light and magnification onto the task. Adjustable positioning reduces awkward angles and eases neck strain. Dimmable LED lighting lets you adjust brightness to match the material. A stable base or clamp keeps the setup hands-free during long sessions. The built-in 6000K daylight LED gives steady, directed light.
For electronics work, the magnifier helps inspect solder joints, microchips, and PCB lines. Pairing tools creates a smooth flow that keeps your eyes relaxed and your work precise.
You now have five tricks to make your lighted magnifying glass work harder for you. Pick the right magnification and brightness for your hobby. Position the lens so the workpiece sits centered and your eye stays above it. Angle the light from the side and diffuse harsh beams to cut glare. Clean the lens with a microfiber cloth and store the tool in a hard case. Keep the magnifier within reach and use it for quick checks.
These habits solve the problems that slow you down. Proper lighting keeps your eyes relaxed and preserves color accuracy. Correct working distance prevents strain and gives you the full magnification benefit. Adjustable brightness makes small details appear sharper. Try one trick today. You will notice the difference in your precision and your enjoyment. Good habits make crafting more fun.
FAQ
How far should my eye sit from the lens?
Place your eye directly above the lens and look straight down. A stand magnifier already sits at its correct focal distance, so keep the base flat and never tilt or lift it. Handheld models let you raise or lower the lens until the image snaps into focus.
What is the safest way to clean the lens?
Use a microfiber cloth and cool water. Wipe in gentle circles. Paper towels leave fine scratches, and harsh chemicals strip the lens coating. Clean the glass before every long session and again before storage, because skin oils and dust build up fast.
Can I leave my magnifier in the car?
No. High heat can warp, bubble, or delaminate lenses and frames. Store the tool in a rigid, hard-shell case with a soft lining. Keep it in a dry, stable spot away from direct sunlight and rapid temperature swings.
How do I stop shadows from falling on my work?
Move the magnifier, not your head. Rotating the lens changes where the shadow lands. A ring-style LED around the lens prevents shadows from your hands and tools. Side lighting also brings out texture on thread, solder, and brush strokes.
When should I replace the batteries?
Swap them out before the light dims. Weak batteries reduce output, and you lean closer to compensate. That extra strain hits your neck and eyes. Remove batteries entirely when you store the tool for a long time, since leaking cells ruin the compartment.